Color-Coated Steel Giving You Trouble?
Here's How to Solve 18 Common Issues.
Guide:
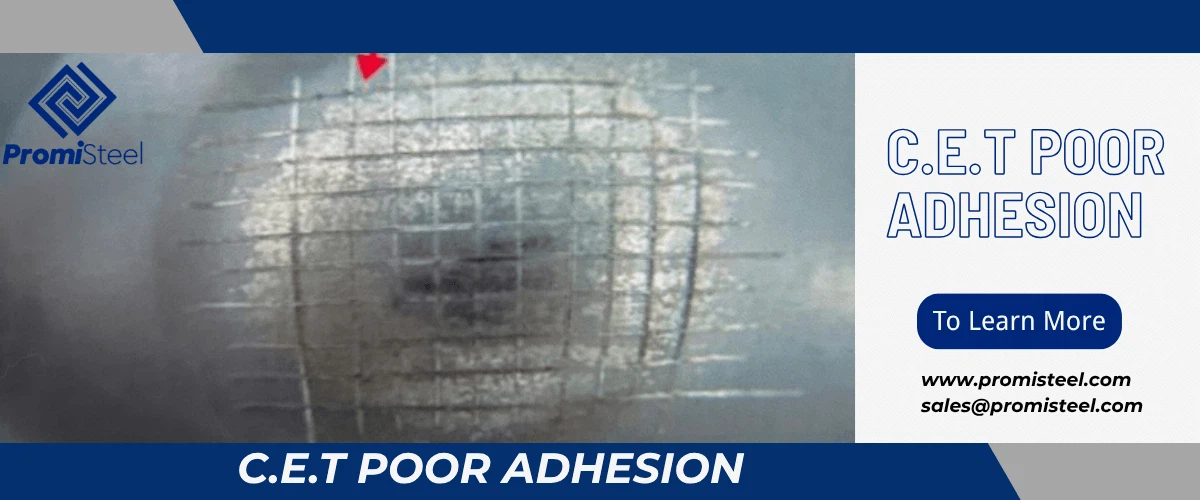
In simple terms, the adhesion of color-coated steel sheets refers to the strength of the bond between the coating and the metal substrate, as well as between the different layers of the coating (such as between the primer and the topcoat).
Why's it Happening?
Ⅰ. Inadequate substrate (base material) treatment
- Surface contaminant residue: If surface contaminants (such as grease, dirt, scale, and rust) are not thoroughly removed during the pretreatment stage, they will prevent direct contact between the coating and the steel sheet, forming an isolation layer or unstable layer, thereby significantly reducing the adhesion of the color-coated sheet.
- Inappropriate surface roughness: Whether the surface is too smooth, resulting in insufficient mechanical anchorage, or too rough or uneven, causing stress concentration in the coating, it will severely affect the adhesion of the color-coated sheet.
- Chemical conversion coating (passivation layer) quality issues: If the chemical conversion coating (passivation layer) is formed unevenly, is not dense, or has improper thickness or chemical composition, it cannot provide an optimal bonding interface for the coating, thereby severely weakening the adhesion of the color-coated steel sheet.
Ⅱ. Issues with the coating itself
Adhesion issues in color-coated steel sheets may stem from the coating itself, including mismatched coating type with the substrate or environment, coating quality defects such as insufficient resin content, improper additive ratios, or uneven dispersion of pigments and fillers, as well as coating degradation during storage.
III. Improper coating process control
Improper coating process control is a key cause of poor adhesion in color-coated steel sheets. This includes uneven or improper coating thickness (too thick, too thin, or uneven), as well as errors in controlling baking temperature, time, temperature rise curve, and cooling rate. These factors directly affect the curing quality of the coating, internal stress, and its bonding strength with the substrate.
IV. Environmental factors and usage conditions
Even if the production quality of color-coated steel sheets is satisfactory, improper storage, transportation, and usage environments (such as prolonged high humidity or sudden temperature changes) and external factors (such as mechanical damage, chemical corrosion, and UV-induced aging) can weaken coating adhesion, leading to issues like bubbling or peeling.
So, what's the real headache when the paint doesn't stick well on your color-coated steel? It's a total disaster waiting to happen!
First off, it just looks awful. We're talking peeling, bubbling, and flaking paint that makes anything look cheap and neglected. But it's way more than just cosmetic. That naked steel underneath quickly starts to rust, leading to leaks in roofs, structural damage in buildings, and ugly stains on appliances. Basically, your stuff wears out way faster than it should.
Then there's the fabrication nightmare. If the paint won't stick, it'll chip and crack when you cut or bend the steel, meaning a ton of wasted material and lost time. And customers? They'll be furious. You'll get hit with warranty claims and a bad reputation, which can seriously hurt your business.
In short, bad paint adhesion isn't just "a little peeling"; it's a huge problem that costs you money, time, and trust.
| How to test the adhesion of Prepainted Galvanized Steel? |
| How to solve the problem of bad adhesion? |
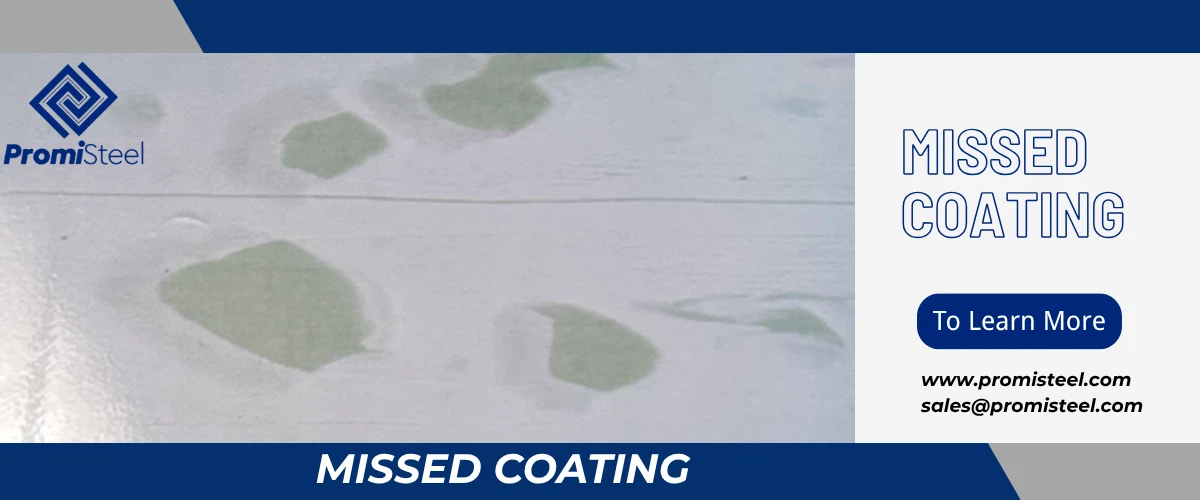
"MISSED COATING" refers to the failure of the coating to evenly cover the surface of the steel coil during the production process, resulting in some areas having no coating or a very thin coating, thereby exposing the substrate.
Why's it Happening?
1. Coating equipment defects
Wear, defects, or uneven pressure/parallelism of the coating roller can result in uneven transfer of the coating, causing localized coating defects.
2. Insufficient coating supply or quality issues
Low coating supply volume, unstable viscosity, or impurities in the coating can directly affect adequate coverage and uniform spreading of the coating.
3. Uneven substrate surface
Waves, scratches, or edge defects on the steel plate prevent the coating roller from making full contact, resulting in coating defects.
4. Mismatch between production line speed and process
Excessively high line speed or improper tension control can hinder the coating from fully wetting and covering the substrate, causing uneven coating.
5. Residual moisture from pretreatment
Excessive residual moisture on the substrate surface after pretreatment can affect the coating's wetting and spreading, indirectly causing localized coating defects.
Imagine that you bought a roll of color-coated steel, and before you even used it, a section of it became "bald," exposing the bare base color. Don't think that this is just unsightly. The exposed area is like a 'cut' in the steel plate, allowing rainwater and dirt to immediately seep in, causing it to rust ten times faster than you might imagine. This is a direct "health hazard"! Steel that should last ten years may be ruined in just one year.
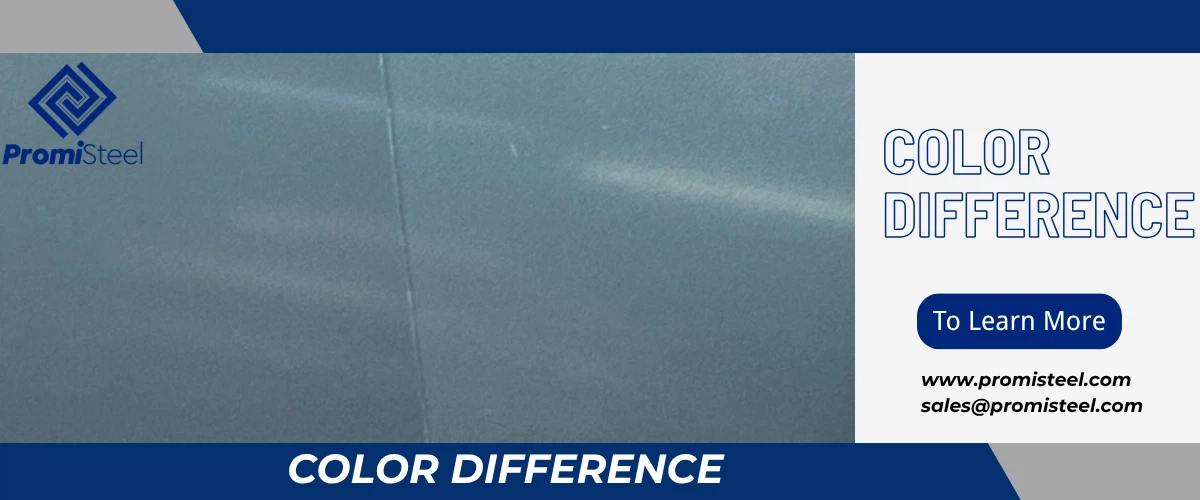
"Color difference" is one of the most common problems. You may often find that the color of the color-coated steel coils produced by the factory differs from what you want. Different batches have different colors, and different coils have different colors.
Why's it Happening?
- Color differences in pre-painted steel coils can arise from issues with the paint itself, such as subtle variations between pigment batches, inconsistencies in paint formulation and mixing, pigment settling due to improper storage, or unstable paint viscosity.
- Inconsistent substrate factors like uneven surface roughness, cleanliness, pre-treatment film, or varying plating thickness can all indirectly affect how paint adheres and reflects light, leading to color differences in the final product.
- Color differences in pre-painted steel coils are often caused by issues in the coating process control. This includes uneven coating thickness-whether too thick, too thin, or inconsistent to factors like roller pressure, gaps, wear, or fluctuating line speeds. Additionally, variations in baking temperature and time can alter pigment stability and film density, leading to color shifts. Inconsistent cooling rates after baking, along with the condition of the coating rollers (wear, cleanliness, or uneven pressure), and unstable line speeds, all play a role in creating visible color inconsistencies across the coil.
-
Color differences in pre-painted steel coils can also be influenced by detection and environmental factors. This includes inconsistent light sources affecting human perception, the observation angle (especially with special effect paints), and improper calibration or use of color measurement instruments, all of which can lead to inaccurate assessments of color.
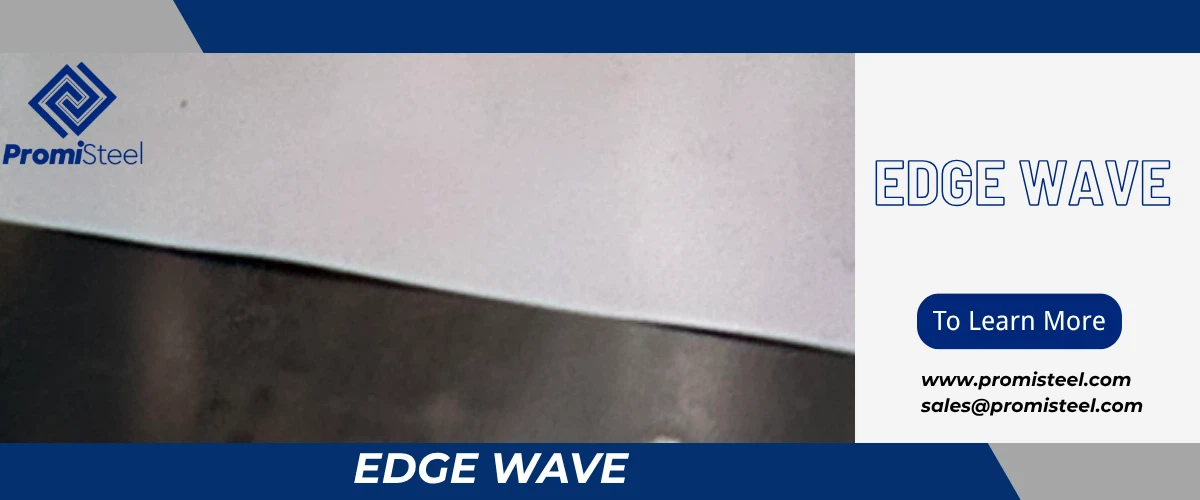
Imagine a standard 400-meter athletics track. The innermost track is the shortest, and the outermost track is the longest.
Now, imagine a steel strip as this track. If the edge of the steel strip (equivalent to the outer track) is stretched longer than the middle (equivalent to the inner track), then when the entire steel strip is laid flat, the middle is flat, but the edges have nowhere to go because of the "extra length", so they can only arch up and form wave-like undulations. This is the Edge Wave.
What is the "culprit" of edge waves?
1. Congenital reasons: "congenital disease" of the substrate, from the cold rolling process
The shape of the steel plate (such as edge waves) is mainly formed during the cold rolling process. After long-term use, the middle part of the roller will be more severely worn than the two ends, forming a shape similar to a "waist drum". When this worn roller presses the steel plate, the pressure applied to the edge of the steel plate will be greater than the middle, so that the metal extension in the edge area exceeds the center area. This uneven extension eventually causes the edge of the steel strip to be "longer" than the middle when it is unfolded, forming edge waves.
2. Acquired aggravation: "Secondary damage" on the color coating production line
- Improper tension control: On the color coating production line, the unwinder and coiler need to apply huge tension to the steel strip to straighten it for painting and baking. If the tension is too large or the tension is unevenly distributed across the width of the steel strip, it may cause secondary plastic deformation (permanent stretching) to the already "fragile" edge, making the edge waves more serious.
- Thermal stress: The steel strip needs to pass through a curing furnace that is tens of meters long and has a temperature of more than 200 degrees. The edges of the steel strip are more likely to heat up and cool down than the middle. This uneven heating and cooling will produce internal stress, which may release or aggravate the original plate shape defects of the substrate, making potential edge wave problems appear.
Cratering (also known as fish eyes) refers to a bowl-shaped or dish-shaped depression defect that appears on the coating surface of color-coated steel coils. Its center is typically shallow, with a raised "ridge" around the edges, resembling a miniature volcanic crater or the shape of an oil droplet spreading on the water's surface, hence the alternative name "fish eye" issue.
The core cause of cratering
The fundamental cause of cratering is just one thing: differences in surface tension. At Promisteel, we can divide the causes into the following four major categories:
1. Contamination of the substrate surface (the most common cause)
This is the main and most direct cause of cratering. Before the coating is applied, the surface of the steel substrate must be extremely clean. Even the slightest contamination can serve as a trigger for cratering.
2. Issues with the coating itself
Coating formulations are precise chemical systems, and any internal issues can also lead to cratering.
3. Production environment and process control
The production workshop is a large system, and any issues in the environment can potentially cause defects.
4. Poor operation and management
Human factors are also significant.
The primary impacts of cratering
Cratering may appear to be merely a minor cosmetic defect, but its negative consequences are profound and critical, sharing similarities with "missed coating" issues while also possessing unique characteristics.
1. A Critical Weak Point in Protection
This is the core hazard. The central area of cratering has a severely insufficient coating thickness, approaching zero. This means the coating's core corrosion protection function is either ineffective or extremely weak in this area.
2. Severe Aesthetic Failure
For applications prioritizing aesthetics, such as building facades, roofs, and appliance housings, cratering is completely unacceptable.
3. Triggering a Chain Reaction of Quality Issues
Once corrosion begins at the center of the pinhole, it will not stop.
4. Significant Financial and Reputational Loss
The paint surface isn't as shiny or reflective as it's supposed to be. It looks dull, flat, or "matte" when it should be glossy. Think of a shiny new car versus one that's been sitting out in the sun for years and lost its sparkle.
Why's it Happening?
- Recipe Problems (Paint Formulation): The type and amount of resins, pigments, and additives in the paint directly affect its gloss level. If the recipe isn't right for a high-gloss finish, you won't get it.
- Not Baked Enough (Insufficient Curing): If the paint isn't fully cured, meaning it hasn't been in the oven long enough or the oven's too cool, it won't develop its full gloss. The surface chemistry isn't quite "done."
- Too Fast Through the Line (Improper Line Speed): If the coil zips through the oven too quickly, the paint doesn't receive enough heat for a sufficient amount of time to cure properly, resulting in a low gloss.
- Wrong Thickness: If the paint film is too thin, it may not achieve the desired gloss.
- Atmosphere in the Oven: Weirdly, sometimes the atmosphere inside the curing oven (like fumes from other processes) can affect how the gloss develops.
How to Dodge This Bullet? (Solutions/Avoidance)
- Get the Paint Right: Work with paint suppliers to ensure the formulation is designed to achieve the target gloss level.
- Bake it Right: Precise control over curing oven temperature and dwell time (how long the coil is in there). This is critical.
- Line Speed Discipline: Maintain consistent and correct line speeds for the specific paint system being used.
- Check and Double-Check: Use gloss meters to measure the gloss of the finished product against the specification.
- Clean Oven Air: Ensure good ventilation and that the oven atmosphere isn't contaminated.
A Simple Guide to PPGI Gloss Levels: Get the Perfect Shine (2025)
These are tiny, literally pin-sized holes in the paint film. They can be scattered all over or clustered in areas. Imagine poking a dry coat of paint with a very fine needle.
Why's it Happening?
- Bubbly Trouble (Solvent Boiling): Paint contains solvents that help it flow and then evaporate during curing. If the paint is heated too quickly, or if the solvents are too "fast" (evaporate too easily), they can boil within the paint film as it's trying to dry. When these tiny solvent bubbles burst at the surface, they leave a pinhole.
- Trapped Air/Gas (Poor Degassing): Air can get mixed into the paint during mixing or pumping. If this air isn't allowed to escape before the paint sets, it can also form tiny bubbles that burst. Some chemical reactions during curing can also release tiny amounts of gas.
- Pesky Contaminants: Just like with cratering, specks of dust or incompatible materials on the steel or in the paint can interrupt the film formation and leave a void.
- Moisture Mischief: If there's moisture on the steel surface or even too much humidity in the air when painting, it can interfere with curing and lead to pinholes.
Impact on target markets
- PEB Building Roofs: Each pinhole is a direct pathway for moisture to reach the steel underneath. This is a corrosion superhighway! Over time, many pinholes can lead to widespread rusting under the paint, causing it to blister and peel, and ultimately leading to leaks.
- Home Appliances: Pinholes are an aesthetic flaw, making the surface look imperfect. More importantly, in appliances exposed to moisture or food spills (fridges, dishwashers, ovens), these tiny holes allow corrosive agents to attack the steel, leading to rust spots and premature failure.
- Transportation (Airports, Train Stations): Pinholes severely compromise the corrosion protection of panels, which is critical for structures exposed to weather and pollution. They also trap dirt, making surfaces look grimy quickly and harder to clean. For a long service life, a pinhole-free coating is essential.
Prevention and Mitigation Measures
- Solvent Smarts: Use the right blend of solvents in the paint, not too fast-evaporating. Control the initial heating ramp-up in the oven to allow solvents to escape gently.
- Let it Breathe (Degassing): Allow sufficient "flash-off" time after paint application and before entering the main curing oven. This gives solvents and trapped air a chance to escape.
- Smooth Application: Ensure paint is applied smoothly without excessive air entrainment.
- Cleanliness is Key: Again, super clean steel surfaces and filtered paint.
- Humidity Control: Where possible, control the humidity in the application area.
- Proper Film Build: Applying the paint at the correct thickness can sometimes help, as a very thin film might be more prone to pinholing.
You see noticeable lines, bands, or stripes running across the width of the coil (perpendicular to the direction the coil was moving through the paint line). It's not a smooth, uniform surface.

Why's it Happening?
- Roller Ruckus: The applicator rolls (which apply the paint) may have an issue. If a roller is out of round, has a buildup of dried paint, or isn't perfectly smooth, it can leave a repeating pattern.
- Uneven Paint Delivery: The system that feeds paint to the applicator might be pulsing or inconsistent, leading to thicker and thinner bands of paint.
- Wrinkling Woes: If the paint is applied too thickly, or if the surface cures too quickly (skinning over) while the paint underneath is still wet, it can wrinkle up like old skin as the solvents try to escape, often forming stripe-like patterns.
- Chatter or Vibration: If there's vibration in the coil line or the coating machinery, it can translate into these stripes as the applicator jiggles against the moving steel.
Impact on target markets
- PEB Building Roofs: On a large, flat roof panel, these stripes can be very obvious, especially in sunlight, making the roof look uneven and poorly made. If the stripes are due to thickness variations, it could mean uneven weathering and protection over time.
- Home Appliances: Nobody wants a fridge with zebra stripes! This is a major aesthetic defect. It shouts "low quality" and would lead to immediate customer complaints or rejections.
- Transportation (Airports, Train Stations): For architectural panels that are meant to be sleek and uniform, transverse stripes are a complete eyesore. They break up the visual flow and cheapen the look of an expensive project.
Solutions & Avoidance
- Roller TLC: Regular inspection, cleaning, and grinding/replacement of applicator and backup rollers.
- Smooth Operator: Ensure consistent paint flow and pressure to the applicator head.
- Curing Control: Optimize paint viscosity, application thickness, and the curing oven profile to prevent wrinkling.
- Steady the Ship: Minimize vibration in the production line through proper maintenance and machine balancing.
- Eyes Peeled: Good lighting and inspection (human or automated) to catch this early.
This is when wet or tacky paint from the freshly coated top side of the coil transfers onto the back side of the strip when it's wound back into a coil. You unroll it later, and the back has smudges or imprints of the front's paint.
Why's it Happening?
- Paint Too Thick: If the paint layer is super thick, it takes longer to cure all the way through. The surface might feel dry, but underneath it's still soft.
- Not Cool Enough (Improper Cooling): After baking, the coil needs to cool down sufficiently before it's rewound. If it's still too warm, the paint remains soft and sticky.
- Wound Too Tight (Excessive Winding Tension): If the coil is wound up with too much pressure, it can squeeze the still-soft paint from the front onto the back of the next layer.
- Undercured Paint: If the paint didn't fully cure in the oven for any reason (oven temp too low, line too fast), it will be prone to transferring.
Impact on target markets
- PEB Building Roofs: While the back side isn't usually visible, severe back staining can indicate the main coating wasn't fully cured, which is a bigger problem for durability. If the back has a specific primer or coating, this transfer can contaminate it.
- Home Appliances: If the back side of the steel is used for internal, unpainted parts, staining might be an aesthetic issue if visible during assembly or repair. More critically, it signals potential undercuring of the main decorative surface, which means poor hardness, adhesion, and longevity.
- Transportation (Airports, Train Stations): Similar to appliances. If the back forms an interior surface, it looks bad. The primary concern is what it implies about the cure of the main, visible surface – if that's not right, big problems are ahead.
Solutions & Avoidance
- Right Thickness: Apply the paint at the correct specified thickness, not too much.
- Chill Out: Ensure the cooling section after the oven is long enough and effective enough to bring the coil temperature down properly before rewinding. Water quenching and air cooling are common.
- Gentle Winding: Control the rewinding tension carefully.
- Cure it Completely: Double-check all oven parameters to ensure full and proper paint cure.
- Interleaving Paper (Sometimes): For very sensitive coatings, sometimes a special paper is wound into the coil between layers, but this adds cost and complexity.
| How can manufacturers avoid PPGI / PPGL BACK STAINING issues? |
| How can customers detect BACK STAINING issues in color-coated products? |
The paint surface is too soft. You can test this by trying to scratch it with a set of calibrated pencils of increasing hardness. If it scratches with a softer pencil than it's supposed to, the hardness is low.
Why's it Happening?
- Not Baked Enough (Poor Curing): This is the number one reason. If the paint doesn't get enough heat for enough time in the oven, the chemical reactions that make it hard don't fully complete.
- Wrong Paint Recipe (Incorrect Coating Formulation): The paint itself might be formulated with softer resins, or the ratio of resin to hardener (if it's a 2-part system, though less common for coil) could be off.
- Too Much Paint: A very thick layer of paint can sometimes be harder to cure all the way through, leaving the bulk of it softer.
Wrong Solvents: Some solvents can be retained in the film if not properly baked out, leading to a softer film.
Impact on target markets
- PEB Building Roofs: A soft paint will get scratched easily during handling on site, installation (tools, walking on it), and by environmental factors like windblown debris or hail. Scratches mean rust. It also means the surface will wear down faster.
- Home Appliances: Imagine your new fridge getting scratched the first time you put a magnet on it, or your washing machine top getting scuffed by a laundry basket. Soft paint means it looks old and worn out very quickly.
- Transportation (Airports, Train Stations): Panels in high-traffic areas or areas prone to contact (luggage, cleaning equipment) will look terrible in no time if the paint is soft. Increased maintenance, reduced lifespan.
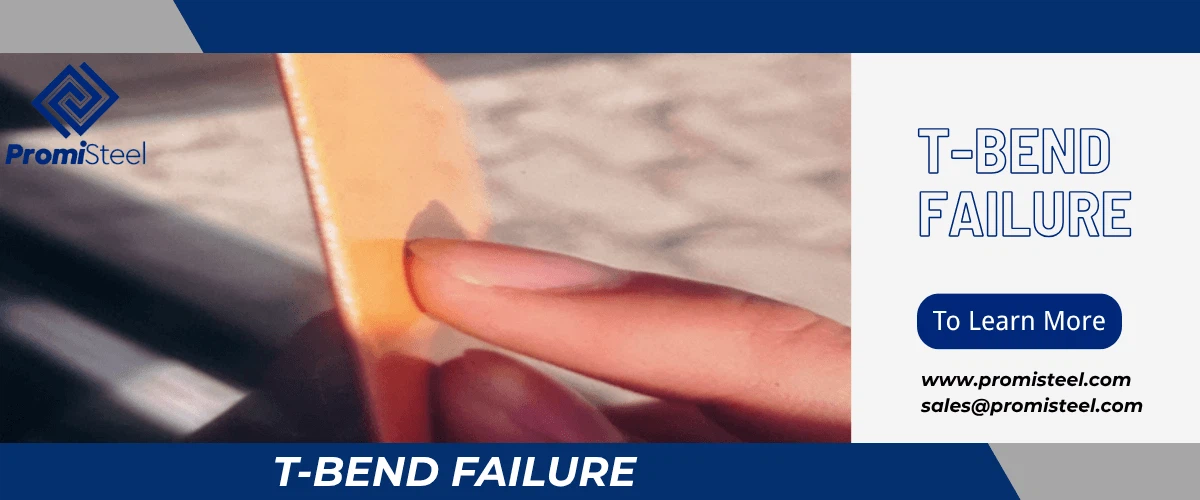
This tests how well the paint can handle being bent sharply. The steel is bent back on itself (0T bend), or around mandrels of increasing thickness (1T, 2T, etc. – T is the thickness of the steel). Failure means the paint cracks, flakes, or loses adhesion at the bend.
Why's it Happening?
- Brittle Paint (Insufficient Flexibility): The paint formulation itself might not be flexible enough. Some resins are naturally more brittle than others.
- Baked Too Hard (Over-curing): If the paint is baked too long or at too high a temperature, it can become overly hard and brittle, losing its ability to stretch with the steel.
- Adhesion Breakdown: Even if the paint is flexible, if it's not sticking well to the steel in the first place (see Poor Adhesion), it will pop off when the steel is deformed.
Bad Prep (Improper Pre-treatment): The chemical pre-treatment not only helps adhesion but can also influence how well the coating system handles forming.
Steel Issues: Sometimes, the formability of the base steel itself plays a role.
Impact on target markets
- PEB Building Roofs: This is HUGE. Roof panels, ridge caps, gutters, flashings – they all involve bending the steel. If the paint cracks at these bends, moisture gets in immediately, and rust starts at the most vulnerable points. The whole system's integrity is compromised.
- Home Appliances: Many parts of appliances are stamped and formed. Think of the corners of a microwave, the edges of a washing machine drum, or the bends in a fridge door. Paint cracking here is a major defect, leading to rust and aesthetic failure.
- Transportation (Airports, Train Stations): Architectural panels often have bent edges or are formed into complex shapes. Cracking paint at bends is unacceptable for both looks and long-term corrosion protection.
Solutions & Avoidance
- Flexible Formulas: Use paint systems specifically designed for good flexibility (e.g., certain polyester types, or more flexible systems like PVDF for demanding bends).
- Don't Overdo the Bake: Careful control of curing to achieve full cure without making the paint brittle. Avoid over-baking.
- Stick it Like Glue: Ensure excellent pre-treatment and adhesion.
- Test the Bend: Regular T-bend testing is crucial for coils destined for forming applications.
- Steel Selection: Use a grade of steel that is suitable for the amount of forming required.
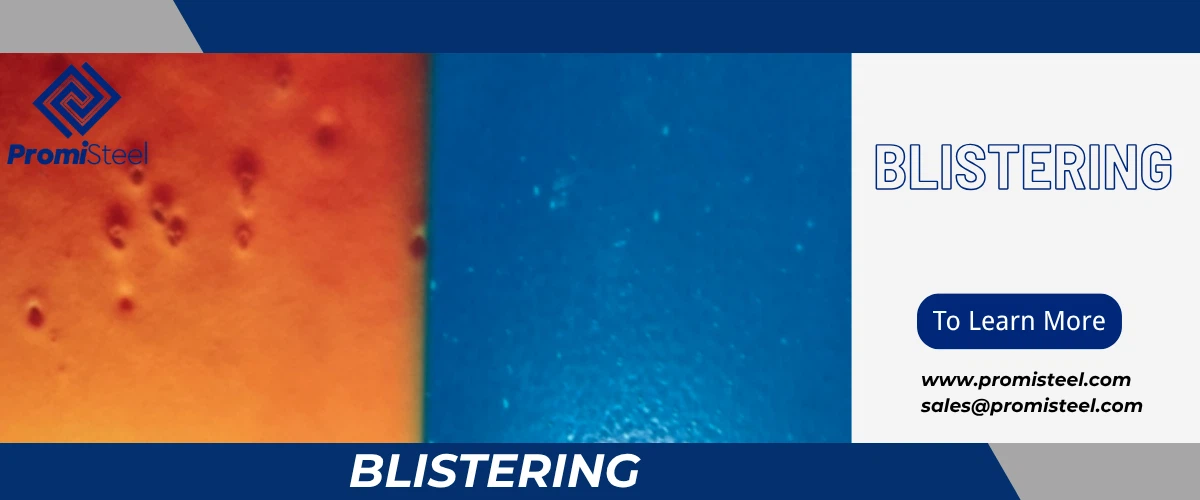
These are raised bumps or blisters on the paint surface. It looks like there's air or something trapped underneath, pushing the paint up. They can be small and numerous or large and isolated.
Why's it Happening?
- Trapped Air/Solvent: If air gets mixed into the paint during application, or if solvents don't escape properly before the paint surface skins over in the oven, they can expand with heat and form a bubble.
- Grease/Oil on the Surface: Patches of oil or grease on the steel can vaporize during baking. This gas pushes up against the paint film as it's trying to cure, creating a blister.
- Moisture Mayhem: Moisture trapped on the steel surface or even within a porous pre-treatment layer can turn to steam in the oven, leading to blisters. High humidity during application can also contribute.
- Reactive Substrate: Sometimes, if the steel surface (or a zinc layer on galvanized steel) is overly reactive with something in the paint or pre-treatment, it can generate gas during curing.
- Osmotic Blistering (Long-Term): This is a different beast that happens after the coil is in service. Water slowly seeps through the paint film and collects at the paint/steel interface, especially if there are soluble salts there. This creates pressure and lifts the paint. For production issues, we're usually talking about the immediate kind.
Impact on target markets
- PEB Building Roofs: Blisters are weak points. They can eventually burst, exposing the steel underneath to the elements and leading to corrosion. A roof covered in blisters looks awful and signals serious quality problems.
- Home Appliances: A blister on a new appliance is an instant return or warranty claim. It's an ugly defect and indicates a problem with the coating process. If they burst, they leave a crater and a potential rust spot.
- Transportation (Airports, Train Stations): Blisters on architectural panels ruin the smooth, intended finish. They are focal points for dirt accumulation and, more importantly, are sites where the coating has lost adhesion and will eventually fail, leading to corrosion and costly repairs.
Solutions & Avoidance
- Super Clean Steel: Thorough degreasing and cleaning are paramount to remove any oil or grease.
- Dry as a Bone: Ensure the steel is completely dry before paint application. Check for any moisture from pre-treatment rinses.
- Proper Flash-Off: Allow enough time between paint application and oven entry for solvents to escape. This is often called "flash-off" time.
- Gradual Heat: A gentler initial ramp-up of temperature in the oven can help drive off volatiles without shocking the paint.
- Paint Formulation: Some paints are more prone to this than others. Work with suppliers for robust formulations.
- Check Pre-treatment: Ensure the pre-treatment isn't leaving reactive residues or trapping moisture.
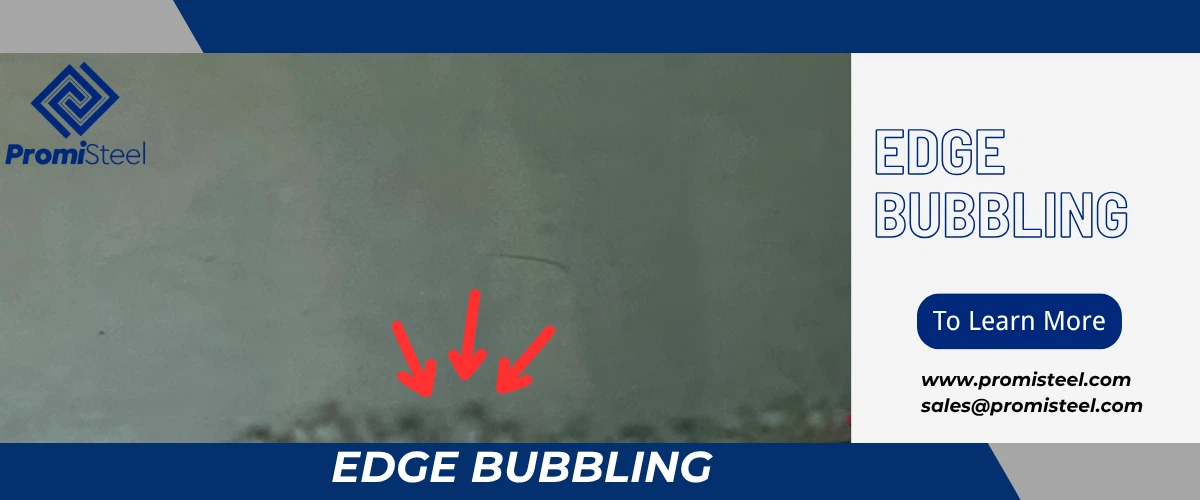
This is a specific type of blistering that happens only along the cut edges of the steel coil. The paint bubbles up right at the very edge.
Why's it Happening?
- Paint Overload (Excessive Paint at Edges): During roll coating, paint sometimes naturally tends to be a bit thicker right at the edges of the applicator roll. This extra thickness can trap more solvents.
- Exposed Edge (Poor Coil Edge Quality): The cut edge of the steel is, well, a cut edge. It's rougher and more reactive than the rolled surface. If the zinc coating on galvanized steel is fractured or pulled back at the edge during slitting, the exposed steel can react, or solvents can get trapped more easily.
- Solvent Entrapment: Solvents have a harder time escaping from the thicker paint film at the edge, or from under paint that has flowed over a rough edge. When heated, they vaporize and cause bubbles.
- Edge Creep" of Pre-treatment: Sometimes, pre-treatment chemicals can wick into the micro-crevices of a cut edge and not be fully rinsed, causing issues.
Impact on target markets
- PEB Building Roofs: If the edge of a roofing panel has bubbles, that edge is compromised. Water will get in at the overlaps between panels, leading to rust that can creep under the main paint film. The seam integrity is lost.
- Home Appliances: Many appliance parts have exposed or hemmed edges. Bubbling here looks bad and is a starting point for corrosion, especially in damp environments (e.g., the bottom edge of a dishwasher door).
- Transportation (Airports, Train Stations): Edges of panels are often visible, especially in modular constructions. Edge bubbling looks shoddy and significantly reduces the corrosion protection at a very vulnerable point.
Solutions & Avoidance
- Control Edge Thickness: Try to minimize excessive paint buildup at the edges during application. Some coating setups have "edge dams" or specific roller profiles.
- Good Slitting Practices: Ensure slitting knives are sharp and properly set to produce clean, minimally damaged edges.
- Edge Treatment (Sometimes): For very critical applications, sometimes an "edge paint" or sealant is applied after the main coating, but this is an extra step.
- Optimized Curing: Ensure good solvent release even at the edges by optimizing the oven profile.
- Thorough Rinsing: After pre-treatment, ensure edges are thoroughly rinsed to remove any chemical residues.
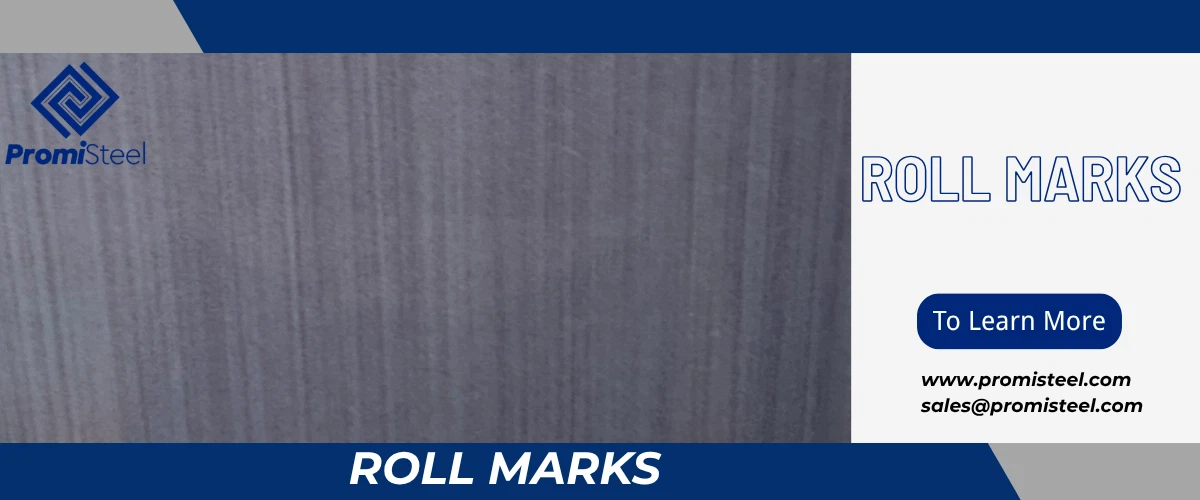
These are visible lines, patterns, or indentations on the paint surface that run along the length of the coil (in the direction of travel). They often repeat.
Why's it Happening?
- Damaged Rollers: A nick, dent, or flat spot on any of the rollers that touch the paint (applicator rolls, smoothing rolls) or even rollers that touch the steel before painting can imprint a mark.
- Debris on Rollers: A piece of dirt, dried paint, or foreign gunk stuck to a roller will continuously transfer its shape onto the coil.
- Worn-Out Rollers: Rollers can wear unevenly over time, leading to subtle variations in how they contact the surface.
- Bearing Problems: A bad bearing in a roller can cause it to bounce or vibrate, leaving a repetitive mark.
Impact on target markets
- PEB Building Roofs: Roll marks are usually very visible on large, flat surfaces, especially under certain lighting. They make the roof look streaky and can give a false impression of unevenness.
- Home Appliances: A distinct line down the front of your new stainless-steel-look (but painted) fridge? Unacceptable. This is a clear cosmetic defect that will lead to rejections.
- Transportation (Airports, Train Stations): On architectural panels designed for a flawless, uniform appearance, roll marks are a major quality failure. They disrupt the aesthetic and look like a manufacturing shortcut.
Solutions & Avoidance
- Roller Maintenance R.O.M. (Regular, Obsessive Maintenance): Frequent inspection, cleaning, and regrinding or replacement of all critical rollers in the line.
- Protective Covers: Some lines use protective films or sleeves on certain rollers that can be easily replaced if damaged.
- Good Housekeeping: Keep the production area clean to prevent debris from getting onto rollers.
- Listen to Your Line: Train operators to listen for unusual noises (like bad bearings) and spot these defects early.
- Automated Inspection: Camera systems can be very effective at picking up repetitive roll marks.
The paint surface has been gouged, abraded, or marked by something sharp or rough. These can be fine hairlines or deep grooves.

Why's it Happening?
- Rough Handling: Dragging coils, bumping them against things, using improper lifting gear. This is a big one during movement within the factory, loading, and unloading.
- Transportation Trauma: Coils shifting or rubbing against each other or a truck bed/container wall during transit if not secured properly.
- Stacking Sins (Improper Stacking): Stacking coils directly on top of each other without protection, or on rough/dirty surfaces.
- Equipment Contact: A misaligned guide, a sharp edge on a conveyor, or debris caught in machinery can scratch the surface as the coil passes.
- Post-Coating Processing: Subsequent operations like slitting or forming can introduce scratches if equipment isn't set up right or is poorly maintained.
Impact on target markets
- PEB Building Roofs: Scratches that go through the paint expose the steel. Hello, rust! Even shallow scratches mar the appearance and can be entry points for corrosion over time. Installers can also cause scratches.
- Home Appliances: This is a deal-breaker. A scratched appliance looks damaged, even if it's brand new. Customers won't accept it. Scratches can also be a hygiene issue, trapping dirt.
- Transportation (Airports, Train Stations): Scratches completely ruin the look of high-finish architectural panels. They indicate poor care and handling and will lead to localized rust, requiring touch-up or replacement.
Solutions & Avoidance
- Handle With Care: Train all personnel on proper handling techniques for coated coils. Use appropriate lifting equipment (e.g., padded C-hooks, wide fabric slings).
- Protective Packaging: Use good quality packaging materials – interleaving paper/film, edge protectors, sturdy pallets, and secure wrapping for shipment.
- Smooth Moves: Ensure all surfaces the coil might contact during processing (guides, rollers, tables) are smooth, clean, and free of burrs or sharp edges.
- Mind the Gap (During Stacking): Use dunnage (spacers) between coils or tiers of coils. Don't stack too high.
- Inspect Equipment Regularly: Check all handling and processing equipment for potential scratch hazards.
- Protective Film (Sometimes): For very sensitive or high-value surfaces, a temporary strippable plastic film can be applied after coating and removed after installation.
The surface has patches or areas that are shinier or duller than the rest of the coil. It's not a uniform gloss level across the board. It looks blotchy.

Why's it Happening?
- Paint Flow Problems (Uneven Paint Flow): If the paint doesn't flow out smoothly and level itself before it starts to set, you can get variations in surface texture that show up as gloss differences.
- Thickness Variations: If the paint film thickness isn't consistent, areas that are slightly thicker or thinner can sometimes cure differently or have a different surface profile, leading to gloss variations.
- Uneven Curing: If some parts of the coil see slightly different temperatures or curing times in the oven (e.g., edges vs. center, or if there are hot/cold spots in the oven), this can affect how the gloss develops.
- Contamination Subtleties: Minor surface contamination (that might not cause a full-blown crater) can sometimes interfere with paint flow just enough to cause a gloss difference.
- Solvent Pop (Minor): Very small, almost invisible "solvent pops" that don't break the surface can still disrupt the smoothness enough to create a dull spot.
Impact on target markets
- PEB Building Roofs: On a large expanse, gloss variations can make the roof look patchy or stained, especially when viewed at an angle or in changing light. It gives an impression of inconsistency.
- Home Appliances: This is a critical cosmetic defect. A blotchy fridge door or washing machine panel looks like a factory reject. It immediately signals poor quality control.
- Transportation (Airports, Train Stations): For architectural statements where a uniform, sleek finish is desired, gloss spots are highly undesirable. They make the surface look imperfect and can be very distracting.
Solutions & Avoidance
- Smooth Application: Ensure the paint application method (roller coating, spraying) is optimized for good flow and leveling.
- Viscosity Control: Maintain consistent paint viscosity; paint that's too thick won't flow well.
- Even Film Build: Strive for consistent paint film thickness across the entire width and length of the coil.
- Uniform Curing: Ensure the curing oven provides even heat distribution. Check for hot or cold spots.
- Cleanliness: A clean substrate and application environment minimize the risk of contaminants affecting flow.
- Proper Flash-Off: Allow adequate flash-off time for solvents to escape before aggressive heating.
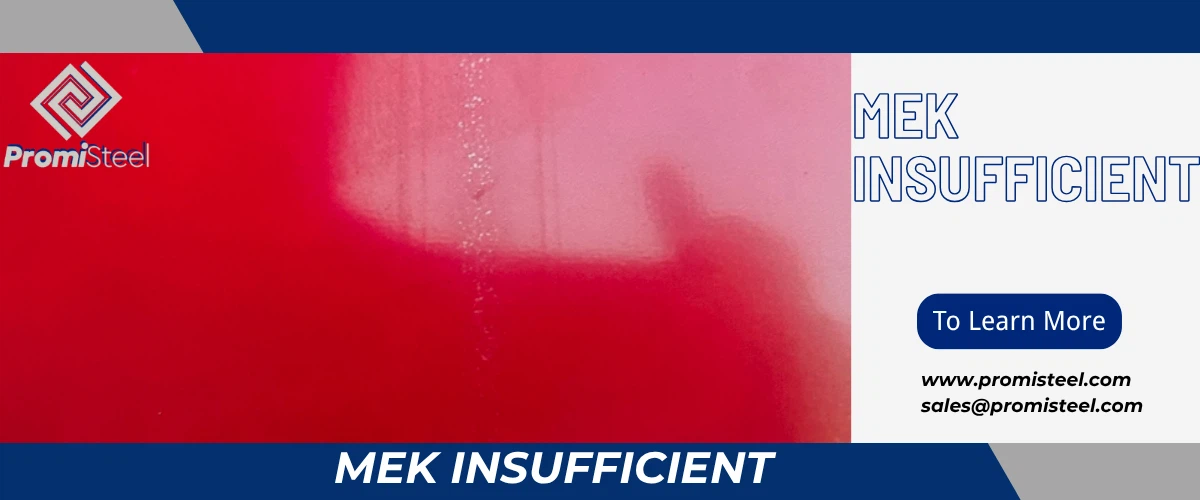
MEK (Methyl Ethyl Ketone) is a strong solvent. A common test is to rub the painted surface a certain number of times (e.g., 50 or 100 double rubs) with a cloth soaked in MEK. If the paint softens, dissolves, or rubs off easily, it has poor MEK resistance. This is a key indicator of how well the paint is cured.
 Why's it Happening?
- Under-Cured Paint: This is the absolute main reason. If the paint isn't fully cross-linked and hardened through proper baking, solvents like MEK can easily attack and break it down.
- Wrong Paint System: Some paint types inherently have lower solvent resistance than others, even when fully cured. However, for most standard coil coatings, a certain level of MEK resistance is expected.
- Incorrect Formulation: If there was an issue with the paint batch itself (e.g., wrong catalyst levels in a 2K system, though less common for coil, or just a bad batch of 1K), it might not cure properly.
Impact on target markets
- PEB Building Roofs: Poor MEK resistance means the paint is not tough. It will be more susceptible to degradation from industrial pollutants, bird droppings, or even harsh cleaning chemicals if the roof ever needs to be cleaned. It's a red flag for overall durability and chemical resistance.
- Home Appliances: Appliances are often wiped down with cleaners, some of which can be quite strong. If the paint has poor MEK resistance, it means it can be damaged by common household chemicals, leading to staining, softening, or dulling. It indicates a generally weak coating.
- Transportation (Airports, Train Stations): Panels in these public spaces are frequently cleaned, sometimes with aggressive detergents to remove graffiti or heavy grime. Poor MEK resistance means the paint won't stand up to this, shortening its life and looking bad quickly. It's a fundamental measure of coating integrity.
Solutions & Avoidance
Cure, Cure, Cure! This is all about achieving a full, proper cure. Monitor oven temperatures (Peak Metal Temperature - PMT) and dwell times religiously.
- Follow the Recipe: Use the paint as specified by the manufacturer. Don't try to cut corners on curing schedules.
- Regular Testing: MEK rub testing should be a routine QC check for every coil or at frequent intervals.
- Supplier Specs: Ensure the paint supplier guarantees a certain level of MEK resistance when their product is cured according to their recommendations.
- Investigate Failures: If MEK tests fail, immediately investigate the curing process. Don't ship suspect material.
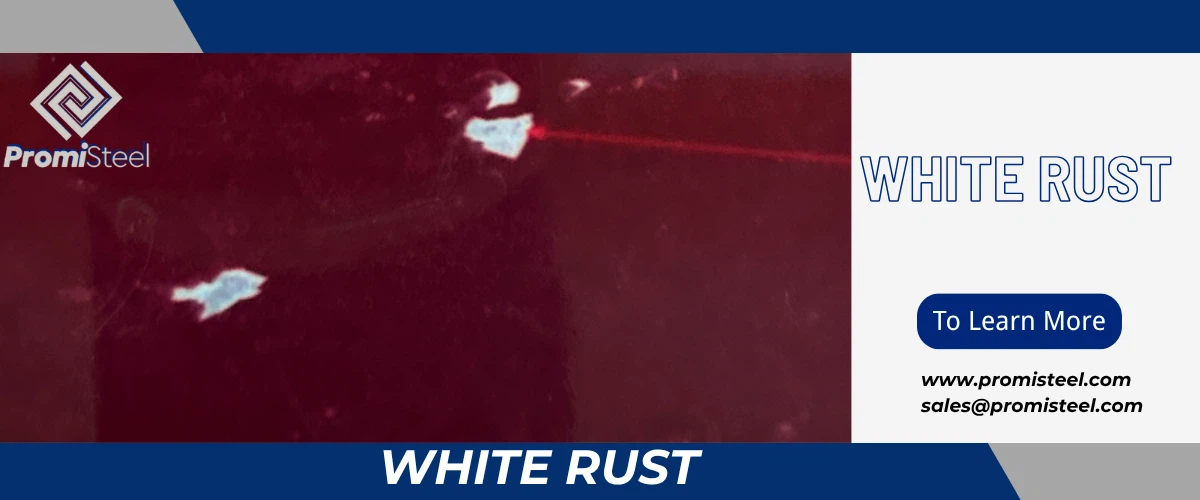
This isn't a paint problem directly, but a problem with the underlying galvanized steel that the paint is on. It's a chalky, white, powdery, or sometimes lumpy deposit that forms on the zinc coating of galvanized steel. It happens before painting or if the paint gets damaged.
Why's it Happening?
- Moisture Exposure (Main Culprit): When bare galvanized steel (or the unpainted back side of a coil) is exposed to moisture (rain, condensation, high humidity) without free air circulation, white rust forms. Water trapped between tightly wound layers of a coil or between stacked sheets is a classic scenario.
- Poor Storage: Storing galvanized coils or sheets in damp, poorly ventilated areas.
- Packaging Problems: Inadequate packaging that allows moisture to get in during transit or storage. Condensation can form inside packaging if there are temperature swings.
- No Passivation/Oil (Sometimes): Freshly galvanized steel is often "passivated" with a chromate or non-chrome treatment, or lightly oiled, to provide temporary protection against white rust before it's painted. If this is missing or insufficient, it's more vulnerable.
Impact on target markets
- PEB Building Roofs: If white rust forms on the steel before it's painted, it creates a poor surface for paint adhesion. The paint might stick initially, but it can peel later. If it forms on the unpainted back side, it means the zinc, which is there for corrosion protection, is being consumed. Severe white rust can compromise the integrity of the zinc layer.
- Home Appliances: If appliance manufacturers receive coils with white rust, they may have to reject them or pre-treat them extensively, adding cost. If it develops on unpainted internal galvanized parts, it's unsightly and shows the zinc is degrading.
- Transportation (Airports, Train Stations): Similar to PEB. If white rust is present before painting, it impacts paint performance. If it occurs on unpainted galvanized components used in the structure (e.g., framing, back-pans), it means the corrosion protection is being used up prematurely.
When it comes to using colour-coated steel to produce a high-quality, long-lasting finished product, it's important to make thoughtful and informed choices.
We've explored 19 common problems, and may encounter others in the future, and wonder if these will help you in your purchasing decisions and production.
Regardless, for steel PEB roof manufacturers, home appliance producers, and manufacturers in the transport industry, understanding these potential pitfalls is the first step in reducing risk and ensuring product integrity. The key is not only in identifying issues, but also in building a strong, transparent relationship with a knowledgeable supplier of colour-coated steel.


